What is a Rototiller?
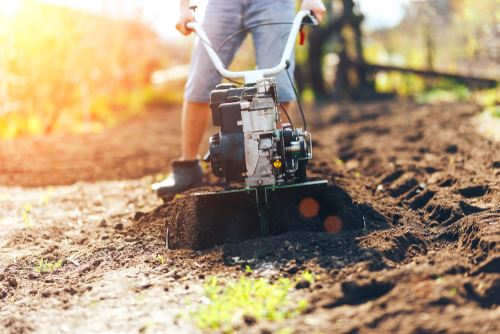
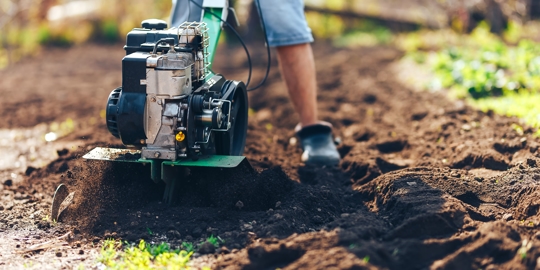
![]() A rototiller is a machine that is responsible for loosening up the soil. It is used for gardening and works by utilizing turning blades (also known as tines) through a motor that help to prepare the soil to grow plants, fruit, or vegetables. A rototiller can be powered by either gas or electricity, depending on the type and model of the machine.
A rototiller is a machine that is responsible for loosening up the soil. It is used for gardening and works by utilizing turning blades (also known as tines) through a motor that help to prepare the soil to grow plants, fruit, or vegetables. A rototiller can be powered by either gas or electricity, depending on the type and model of the machine.
When to Use a Rototiller
Time to refresh your lawn? Looking to prepare your yard for seed or sod? Trying to level the ground? A rototiller may be the most effective tool for accomplishing your goals. However, to ensure you reap the best results you need to know how to prime your yard and properly utilize the rototiller equipment.
Thankfully, Calgrove Equipment Rentals is here to explain how to use a rototiller to accomplish your level ground. With the power of a rototiller, you will be able to loosen compacted soil without going through backbreaking work.
Renting the Right Rototiller
You must have the right tools to complete your job successfully. Renting the right rototiller comes down to checking what tine diameter and the tilling width and depth you require to complete your project. Look for a rototiller with forward rotation, tine shields, and any additional attachments you may need for subsequent features.
A Note on Rototiller Depth
Generally speaking, the larger the rototiller, the greater its maximum depth will be. For many home garden projects, tilling a depth of around 6 inches should be sufficient.
How to Use a Rototiller
Rototillers are invaluable. That is, if you use them correctly! Follow these steps and you’ll have a golden garden, sound ground for foundational building, or the perfect planting plot.
1. Prepare Your Ground for Rototilling
Rototillers, no matter how powerful, cannot cut through rocks and other large debris. So, before you begin tilling, remove any large sticks, stones, etc. to ensure you do not damage your equipment. Next, remove any existing grass to achieve the best possible results.
Then, check your ground's moisture. You want to have a moderate level of moisture, so your soil does not clump together. Water the area you are going to till; however, make sure to not make your grounds muddy.
Now, if you are planting in this area, it is time to spread mulch and fertilizer over your targeted surface. About two inches of coverage will provide the enhancement to the soil that you are looking for.
2. Adjusting Your Rototiller
Make sure you check your tiller depth before beginning. For most jobs, a tiller depth between four and six inches will prove ideal, as you won’t encounter tree roots or rocks which can damage your rototiller. Once you have prepared the correct settings, it’s time to till the area.
If the soil is compact and hard, start tilling with the shallowest setting. However, if you have watered the grounds, you can continue with your desired depth.
3. Begin Tilling
Now it’s time to go over your grounds! In parallel rows, as if you were mowing your lawn, go over the surface evenly and perpendicularly. Make sure you don’t miss an area, or you could encounter issues with your planting or job site.
4. Smooth the Surface
For those who are planting: after you complete rototilling your lawn, go over the area with a rake. This will reveal if there is any remaining debris that you may have missed. After establishing a smooth surface, leave the site alone for a week. After this period, if there are no weeds growing, you will be able to install fresh sod or seed your lawn!
Rototilling Tips to Remember
Here are some tips to remember that can come in handy when using a rototiller:
- Do not overwork the soil: This can happen when you pass over an area too many times, so make sure you are keeping track of your movements.
- Periodically clean the tines and remove any tangled or built-up debris: This will ensure that your rototiller is functioning efficiently and will additionally prevent system breakdowns.
- Check the ground's moisture: It's important that the ground is not too dry and that it has enough moisture for best results. If the ground feels too dry, you could wet the area and give it some time to soak up the water.
- Spread mulch and fertilizer: Spreading mulch and fertilizer before using the rototiller can greatly help to enhance the soil's health. It's a great tip for helping to take care of existing damage to the soil.
- Check the settings: Make sure to double-check the settings of your rototiller and adjust them accordingly.
For your rototiller rental needs in the greater Los Angeles area, contact Calgrove Equipment Rentals at (818) 805-1617. We provide industry-standard equipment for you to accomplish your goals.